Manual connect -WPA/WPA2/WPA3-
-
If the following screen is displayed, press the OK button.
If the following screen is not displayed, proceed to the next step.

-
Enter the password. Text entry is case-sensitive.
For how to enter characters and how to change the character type, see "Entering Numbers, Letters, and Symbols" (appears in a new window).

Printer without numeric buttons

Printer with numeric buttons
If you don't know the password for your wireless router, see the wireless router manual or contact its manufacturer.
-
Complete entry.
For printers without numeric buttons, select OK on the keyboard, and then press the OK button to complete the entry.
For printers with numeric buttons, press the OK button to complete the entry. -
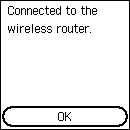
When the following screen appears, press the OK button.

If a different screen appears, see "Troubleshooting."
-
Press
 (HOME).
Printer without numeric buttons

Printer with numeric buttons
The network connection setup is now complete.
Once connection is complete,
 appears at the upper left of the screen.
If performing setup without using computer, smartphone, etc.:
-
Download and install software.
After installing the software, start the software, and then follow the on-screen instructions to proceed with setup.
If performing setup using computer, smartphone, etc.:
-
After checking the following, click the close button on the Web browser to close this guide.
Windows

Click
 or
or  in the taskbar, and then follow the on-screen instructions to proceed with setup.
macOS

Click
 in the Dock, and then follow the on-screen instructions to proceed with setup.
Smartphone/tablet
Return to the
 app on the smartphone, and then follow the on-screen instructions to proceed with setup.

